GitHub Public Repository Creation Guide
This guide is intended for IoT developers using loT Driver Copilot. It walks you through creating a public GitHub repository with a main branch, ready for IoT Driver Copilot’s automatic code generation.
Create a Repository via the GitHub Web UI
-
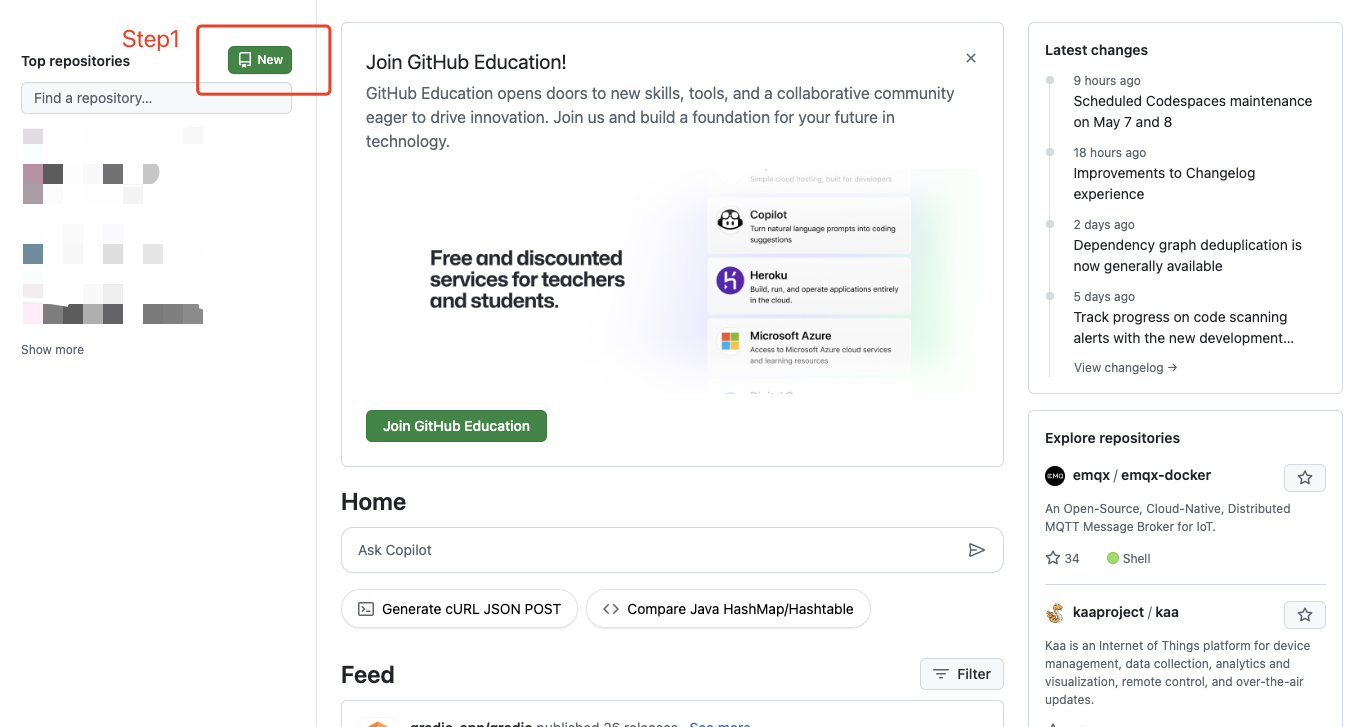
Log in to GitHub and click the "New" button in the top-left corner.
-
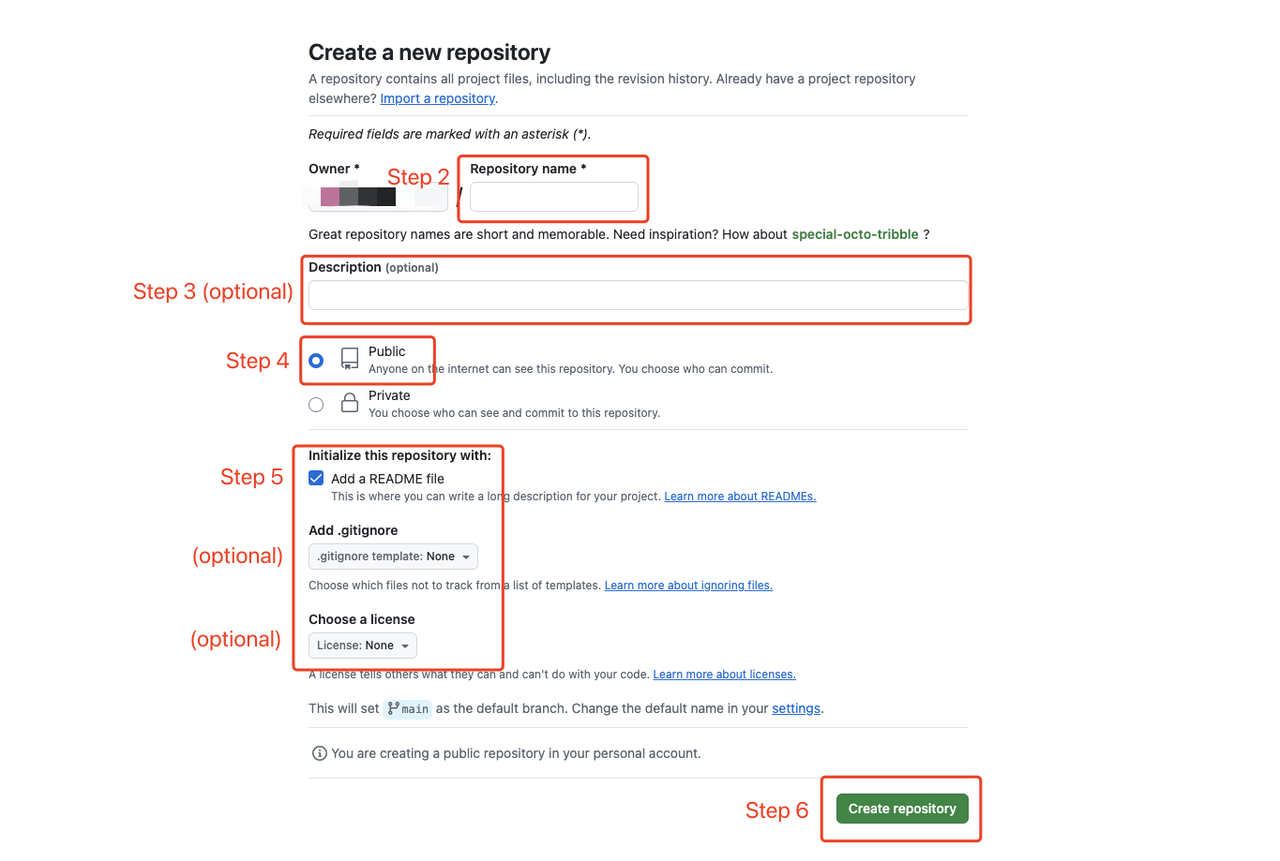
Repository name
Enter your desired repository name (e.g.my-shifu-project) in the Repository name field. Choose a concise, memorable name. -
(optional) Description
Fill in the Description field to briefly describe the purpose of your project. This is optional but recommended for clarity. -
Visibility
Select Public. Free tier users can only have their driver code published to repositories that are public. If you require a private repository, please reach out to info@edgenesis.com for more information. -
Initialize this repository with
- Check Add a README file to automatically create a
README.md. - (Optional) Use Add .gitignore to choose a template and exclude common build or dependency files.
- (Optional) Use Choose a license to add an open-source license (e.g. MIT, Apache 2.0).
- Check Add a README file to automatically create a
-
Create repository
Click the green Create repository button to finish setup and navigate to your new repository’s homepage.