LwM2M
Introduction
LwM2M (Lightweight Machine to Machine) is a lightweight Internet of Things (IoT) device management protocol developed by OMA (Open Mobile Alliance) to provide efficient remote management and communication solutions for resource-constrained devices.
Why use LwM2M protocol?
LwM2M (Lightweight Machine-to-Machine) protocol is designed for low-power, low-bandwidth devices, addressing the following issues:
- Communication for low-power devices: Optimized for efficient communication in low-power devices, suitable for sensors and other IoT devices.
- Device management: Provides standardized management methods for device registration, remote configuration, and firmware updates.
- Adaptability to network limitations: Effectively transmits data in low-bandwidth, high-latency environments.
- Bandwidth and resource savings: Reduces bandwidth consumption with an efficient message format.
- Standardized protocol: Offers a unified interface that simplifies integration across different devices and platforms.
Overall, LwM2M provides an efficient, resource-saving communication method, ideal for large-scale IoT applications.
Note
The LwM2M protocol support was introduced in Shifu v0.57.0. Ensure that you are using version v0.57.0 or newer for LwM2M compatibility.
Deployment
-
Click on Add Device -> Protocol menu.
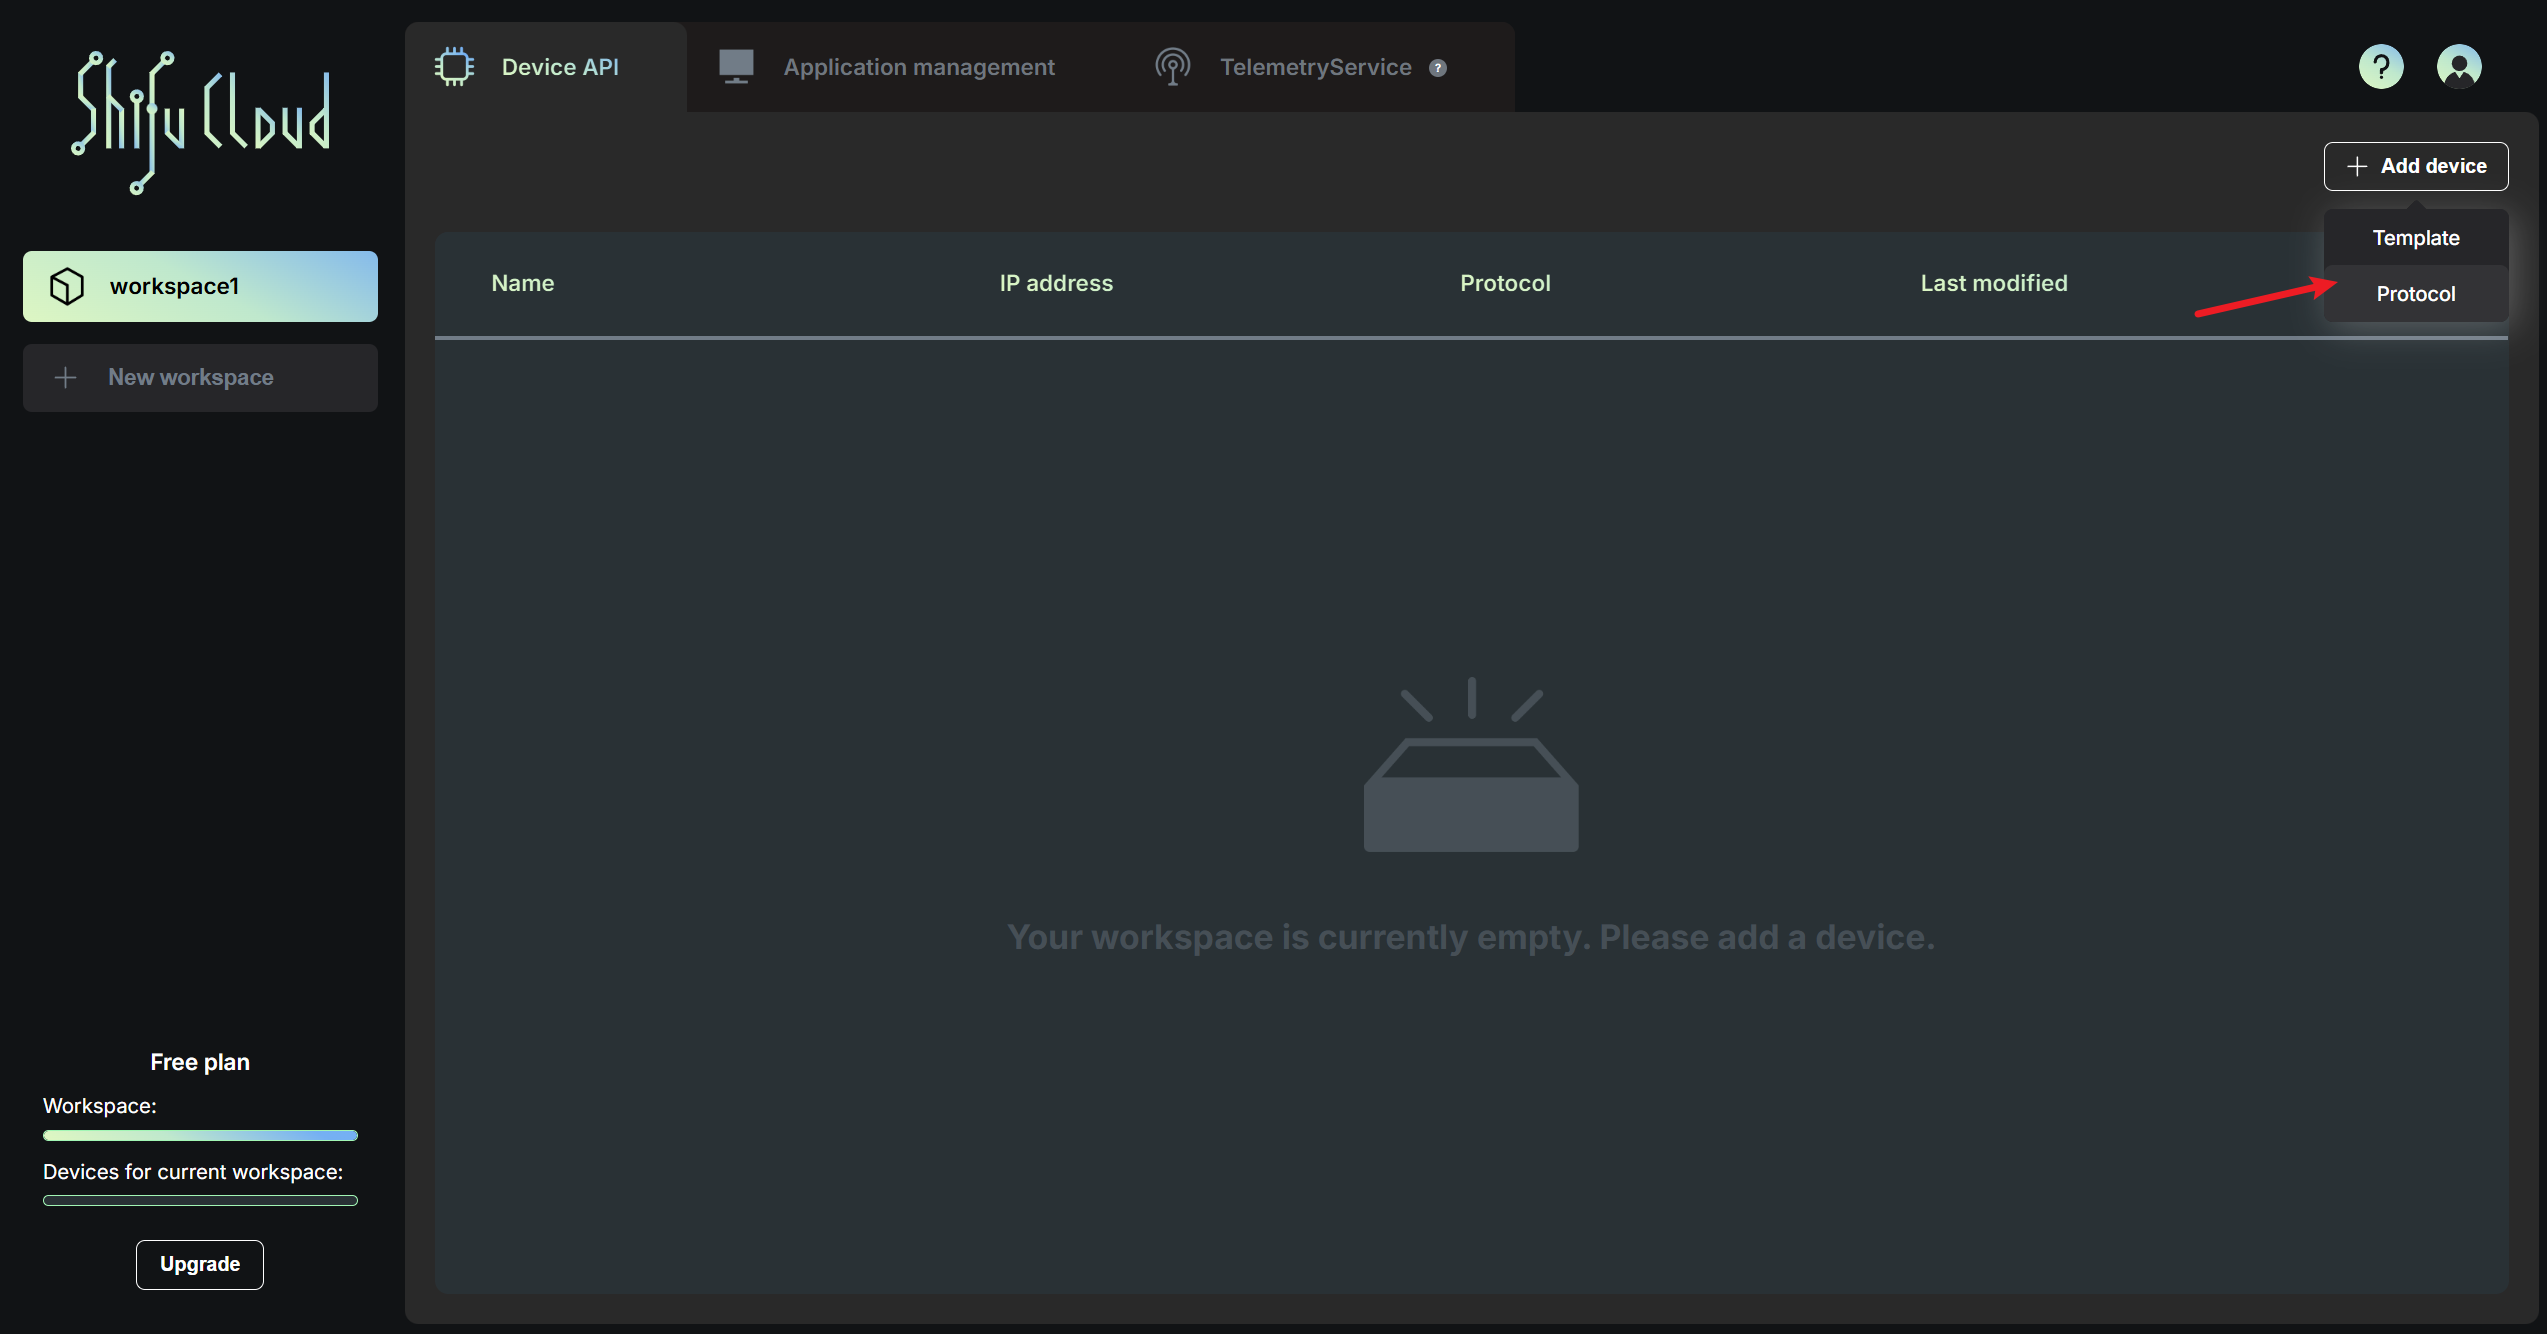
-
Select
LwM2Mprotocol from the list of protocols and click on Next step.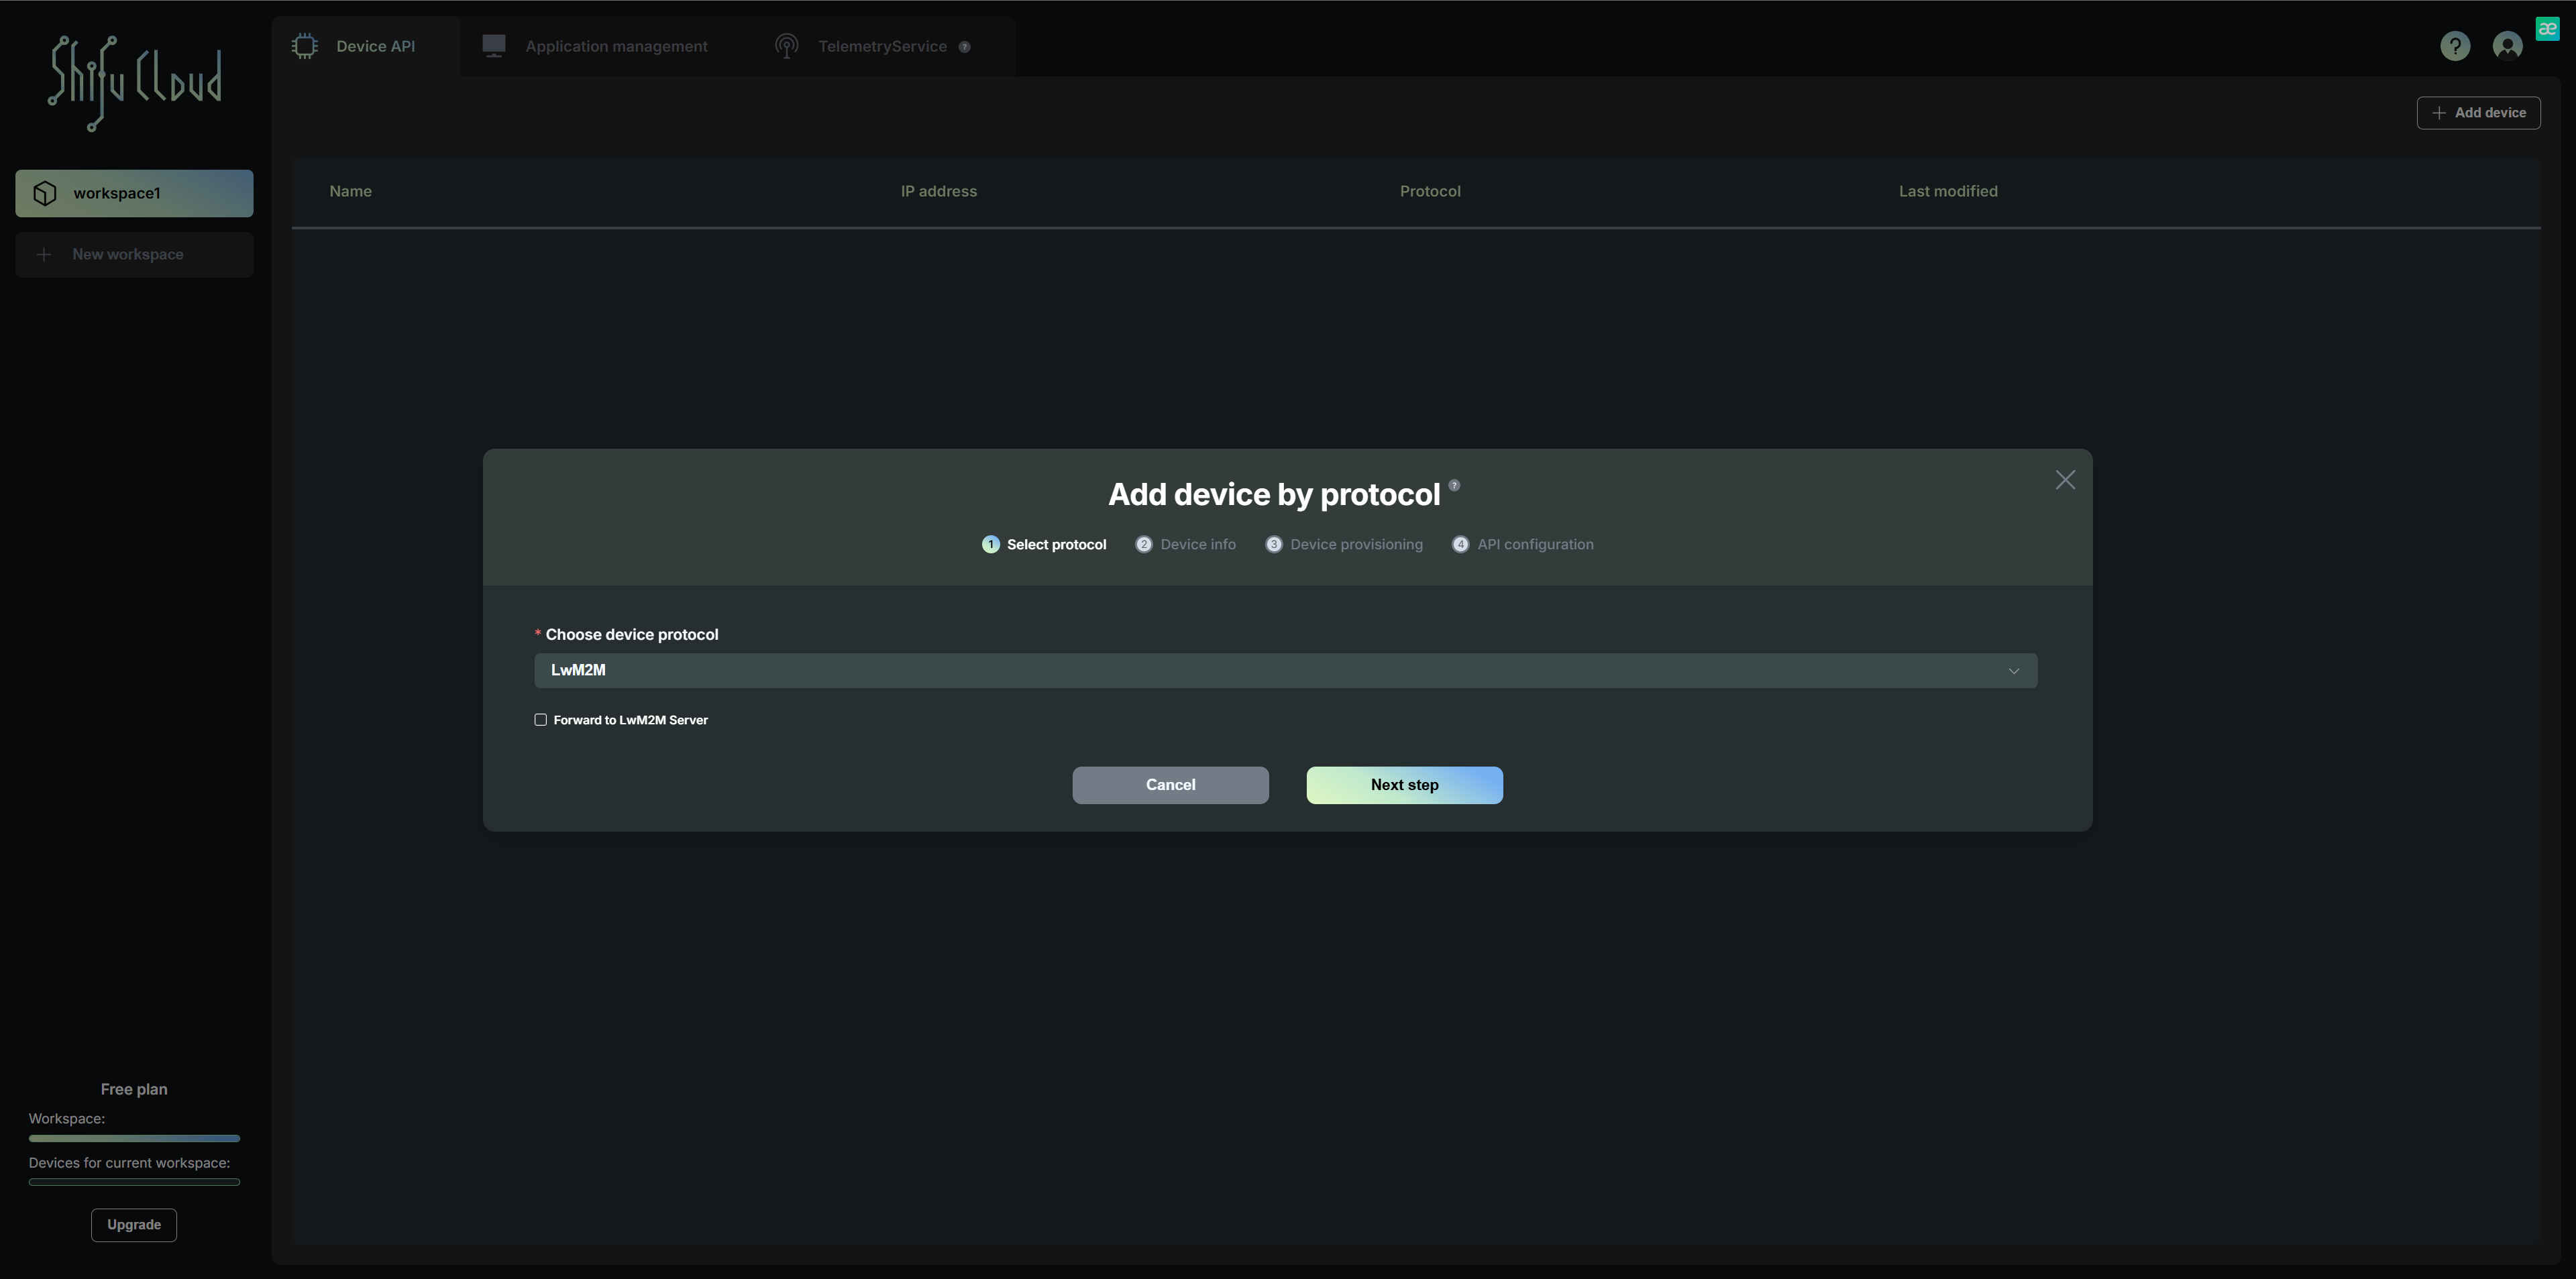
-
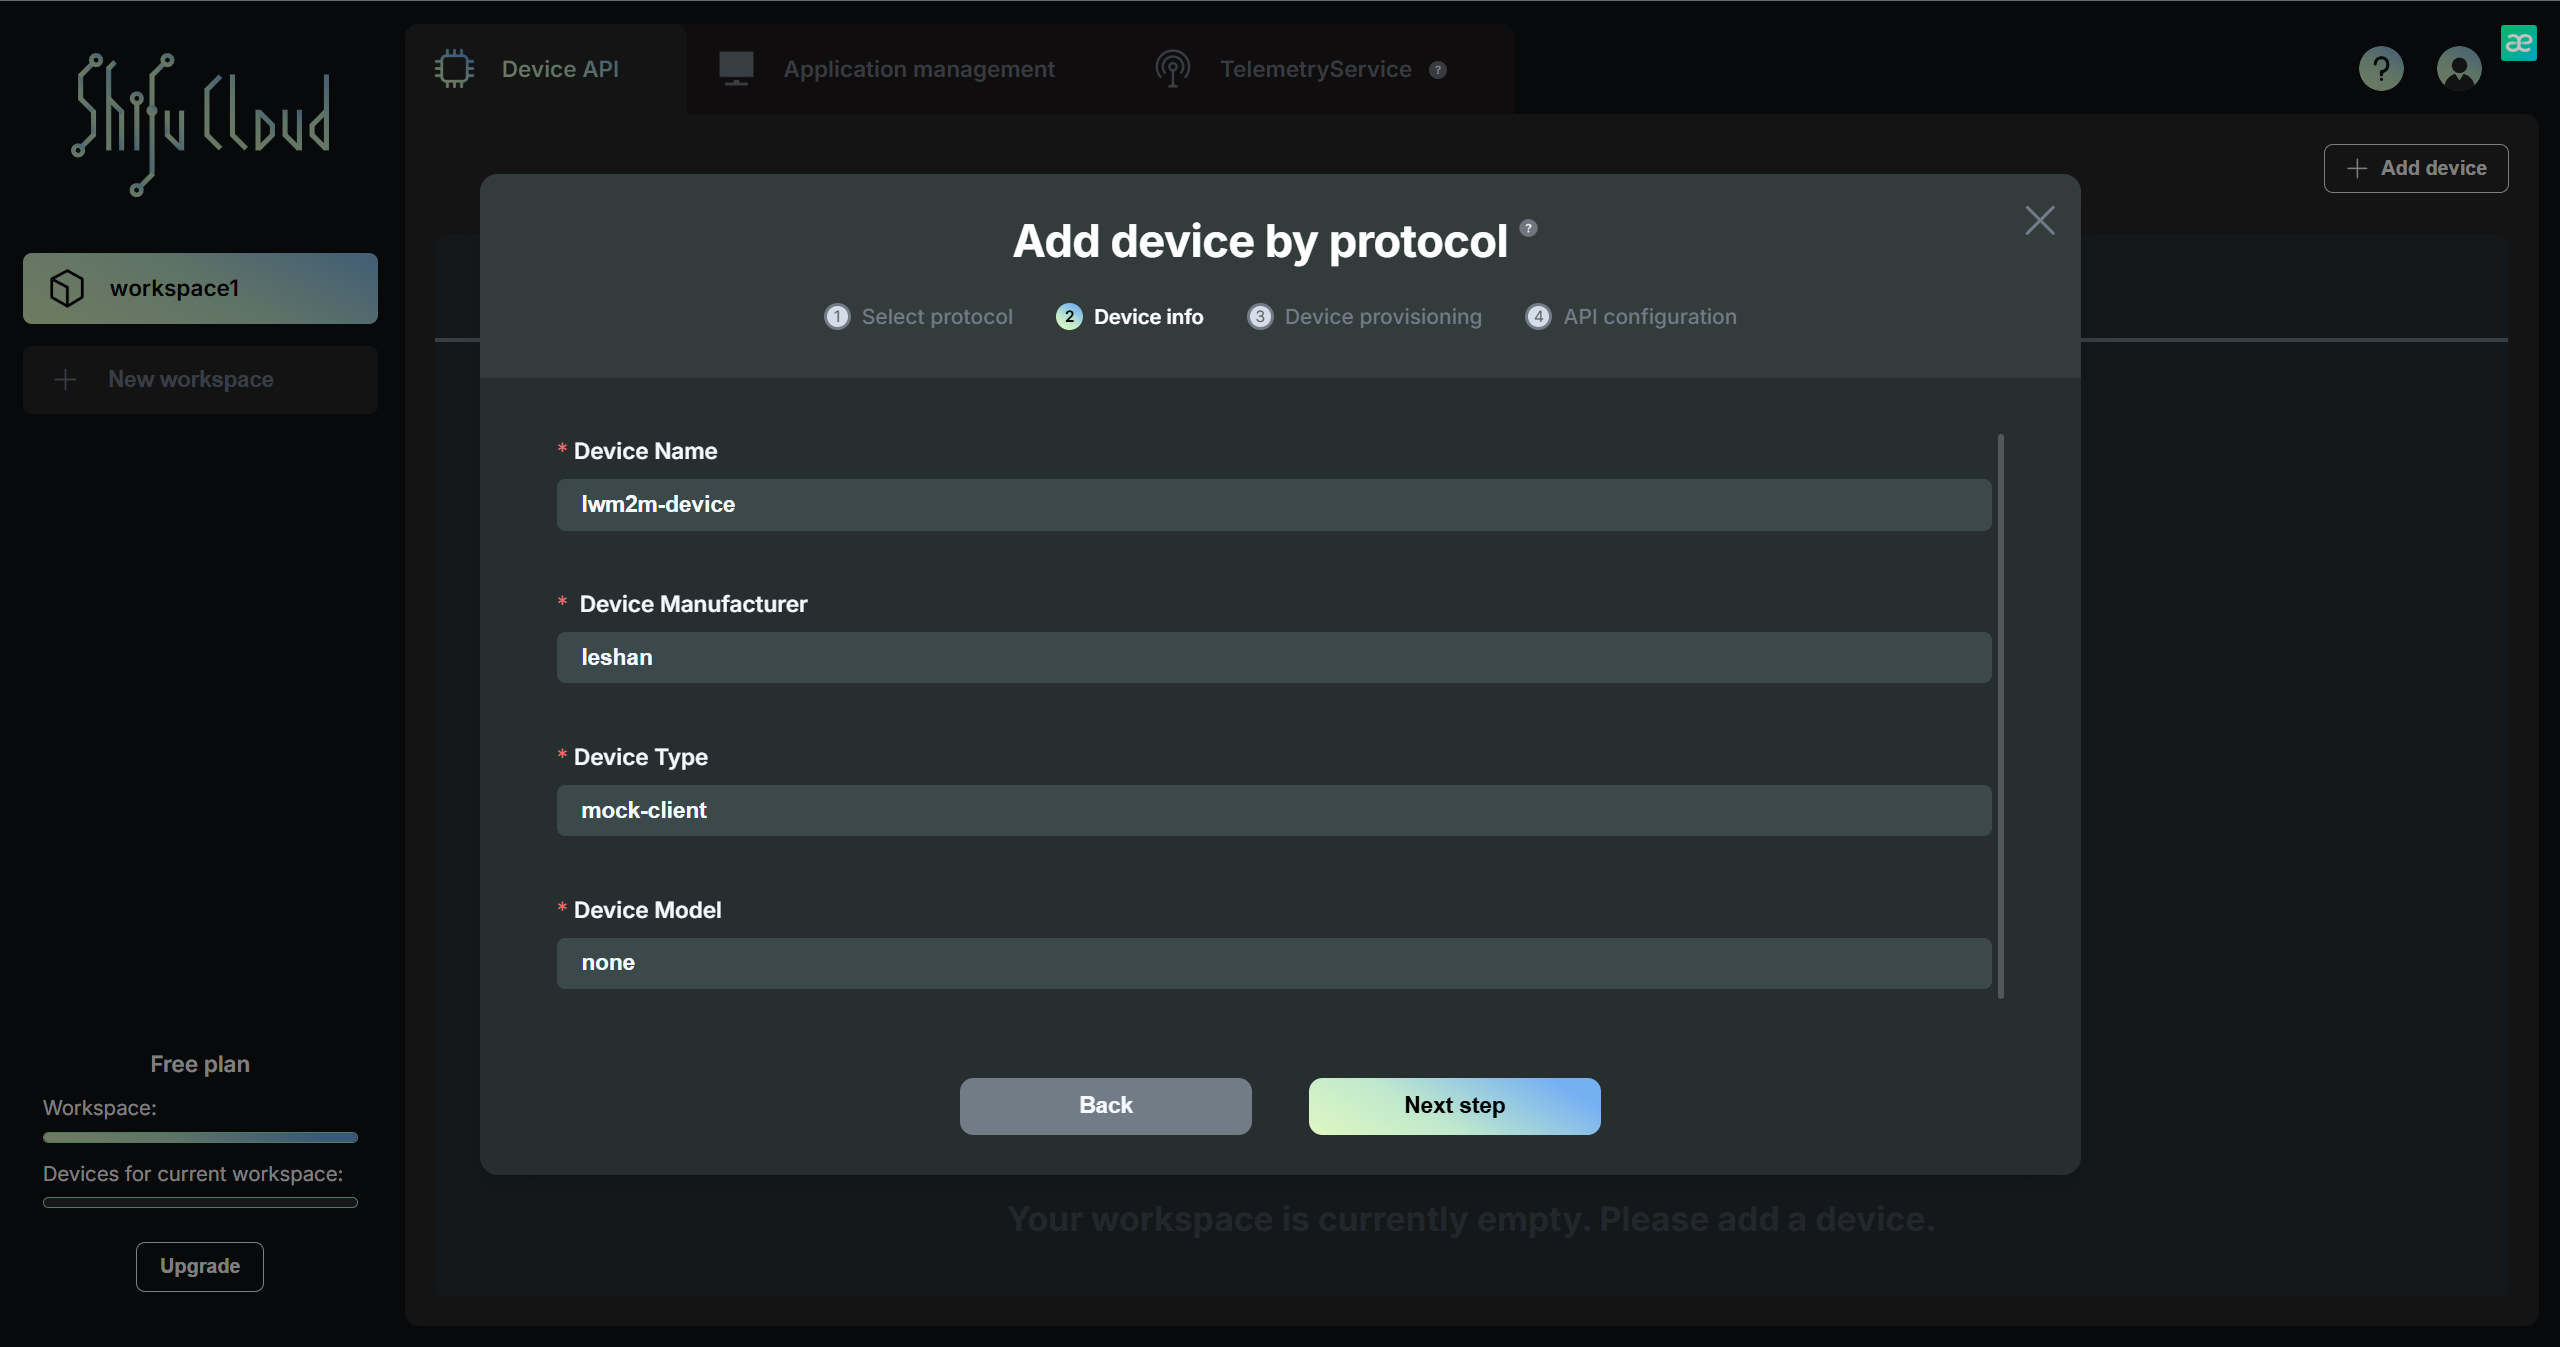
Fill in the device name, device manufacturer, device type, and device model. The device name is the identifier used to distinguish different devices in Shifu Cloud. Then click on Next step.
-
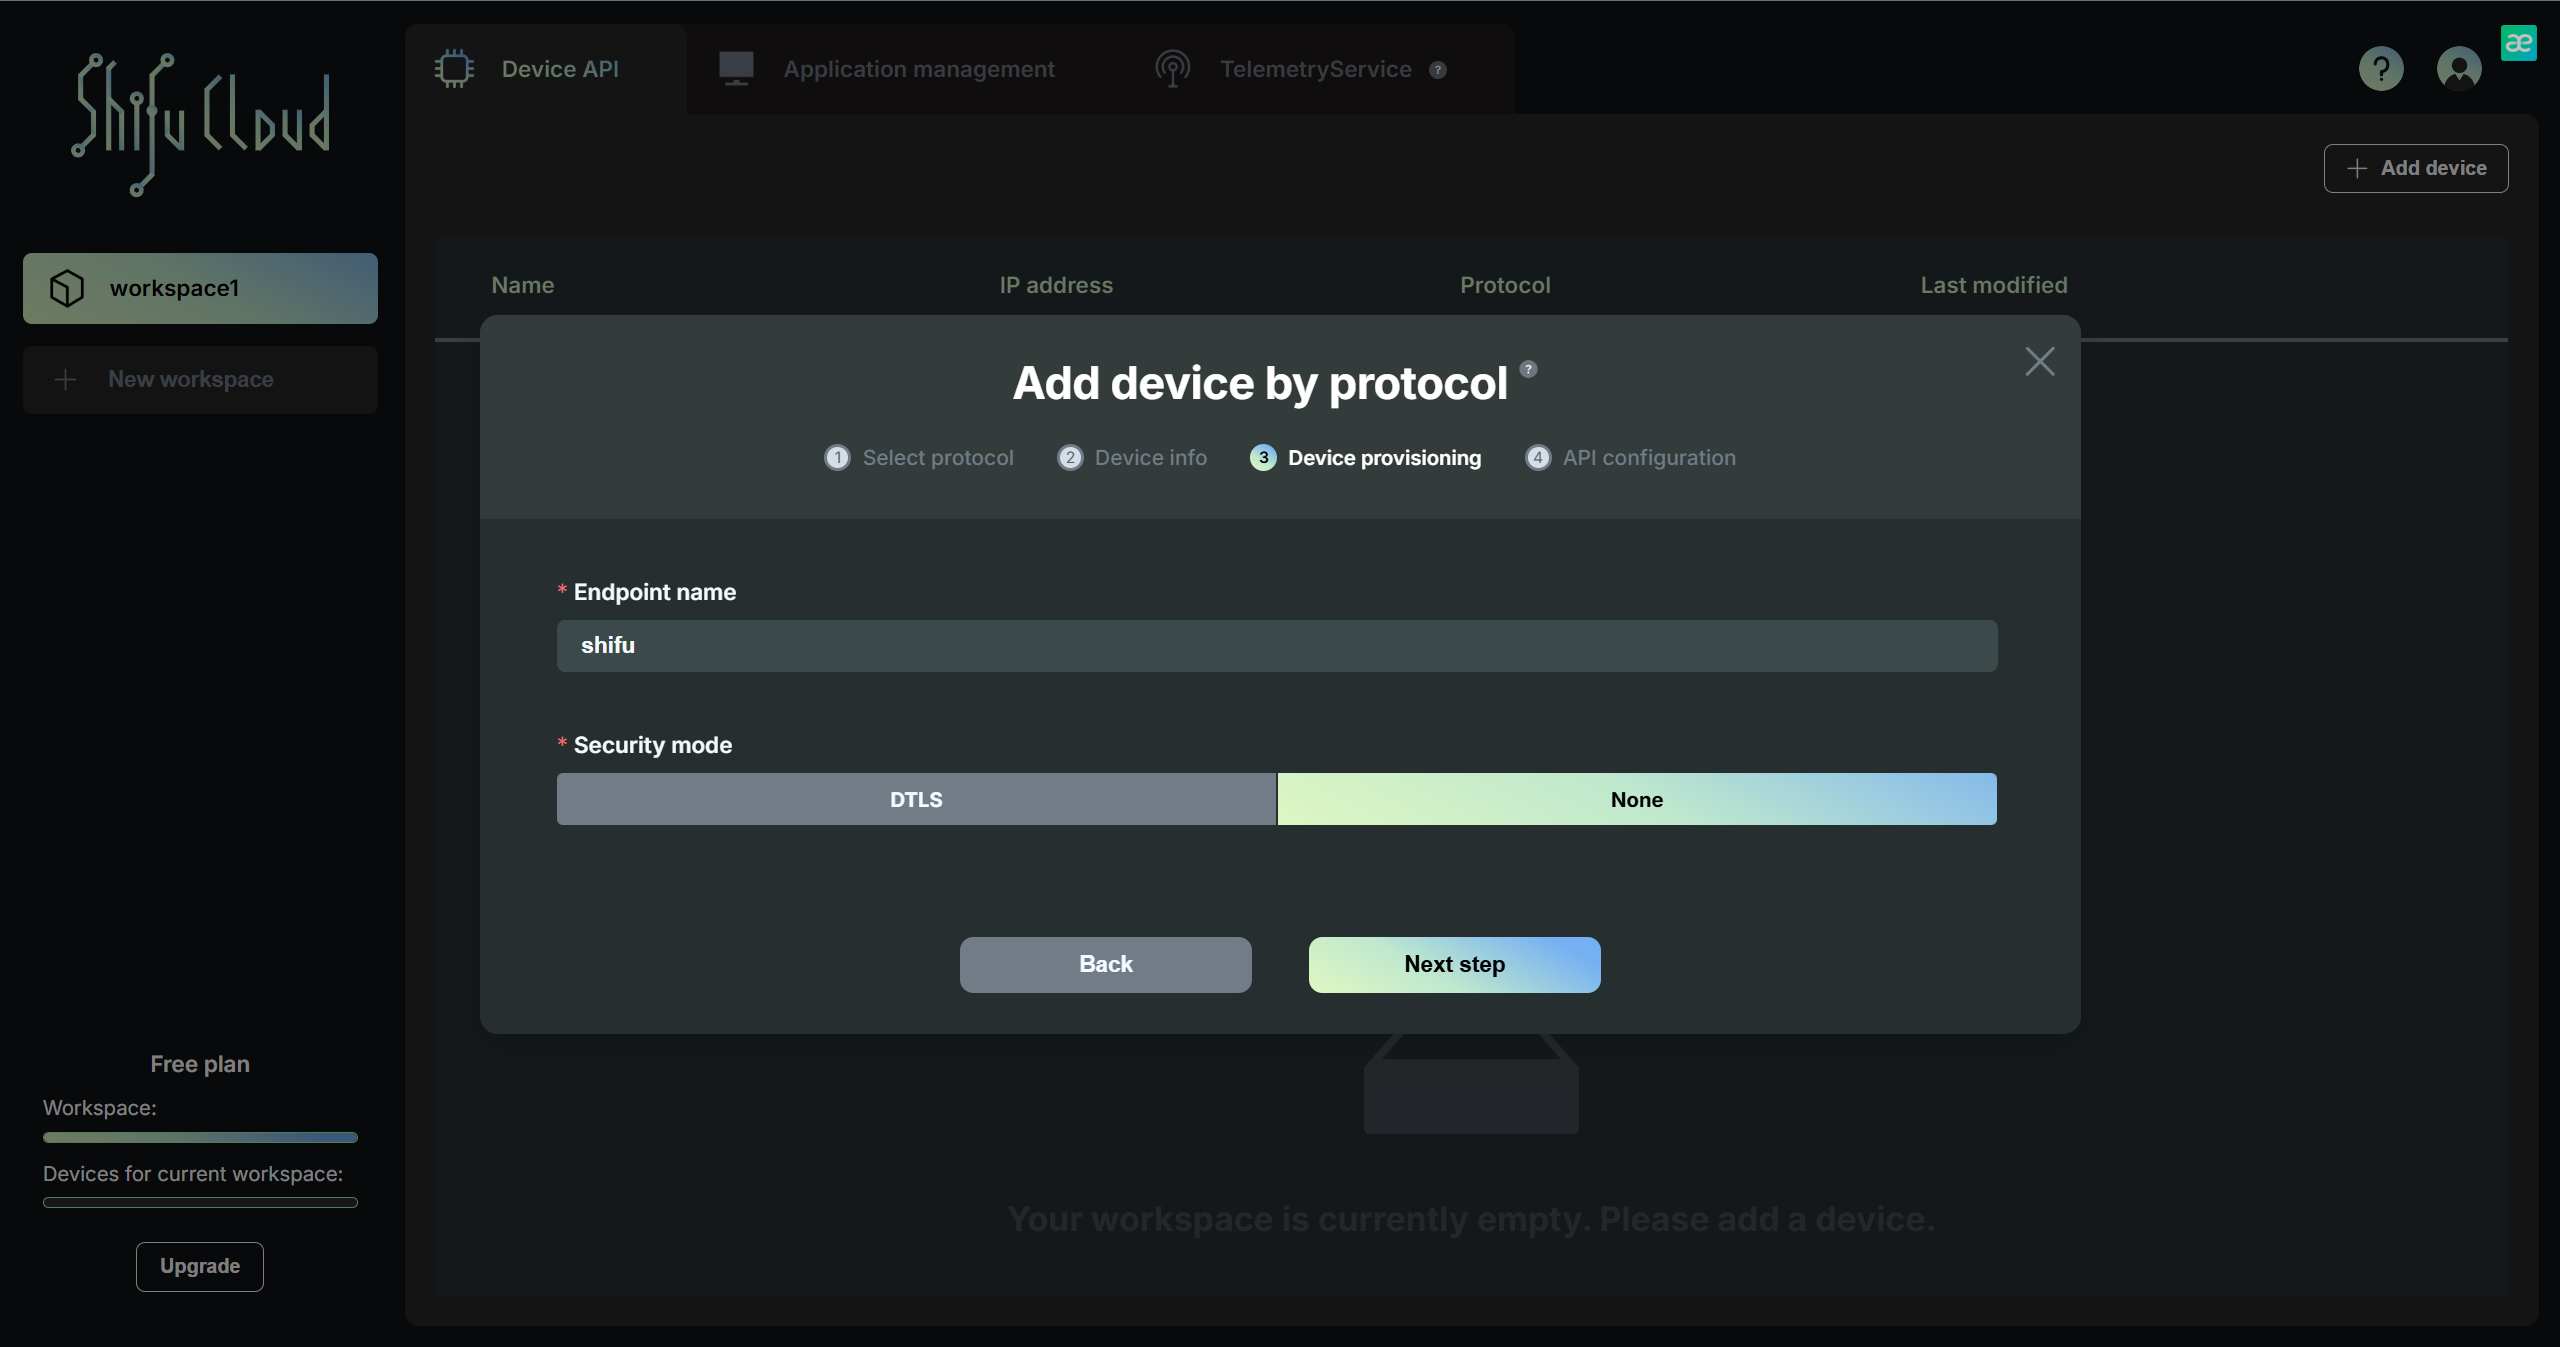
Enter the endpoint name, which must match the endpoint name of your LwM2M device. Choose a security mode:
- DTLS (PSK Mode): Enter the PSK identity and the PSK key in hexadecimal format, then click Next Step.
- None: If no security is required, select this option and proceed.
-
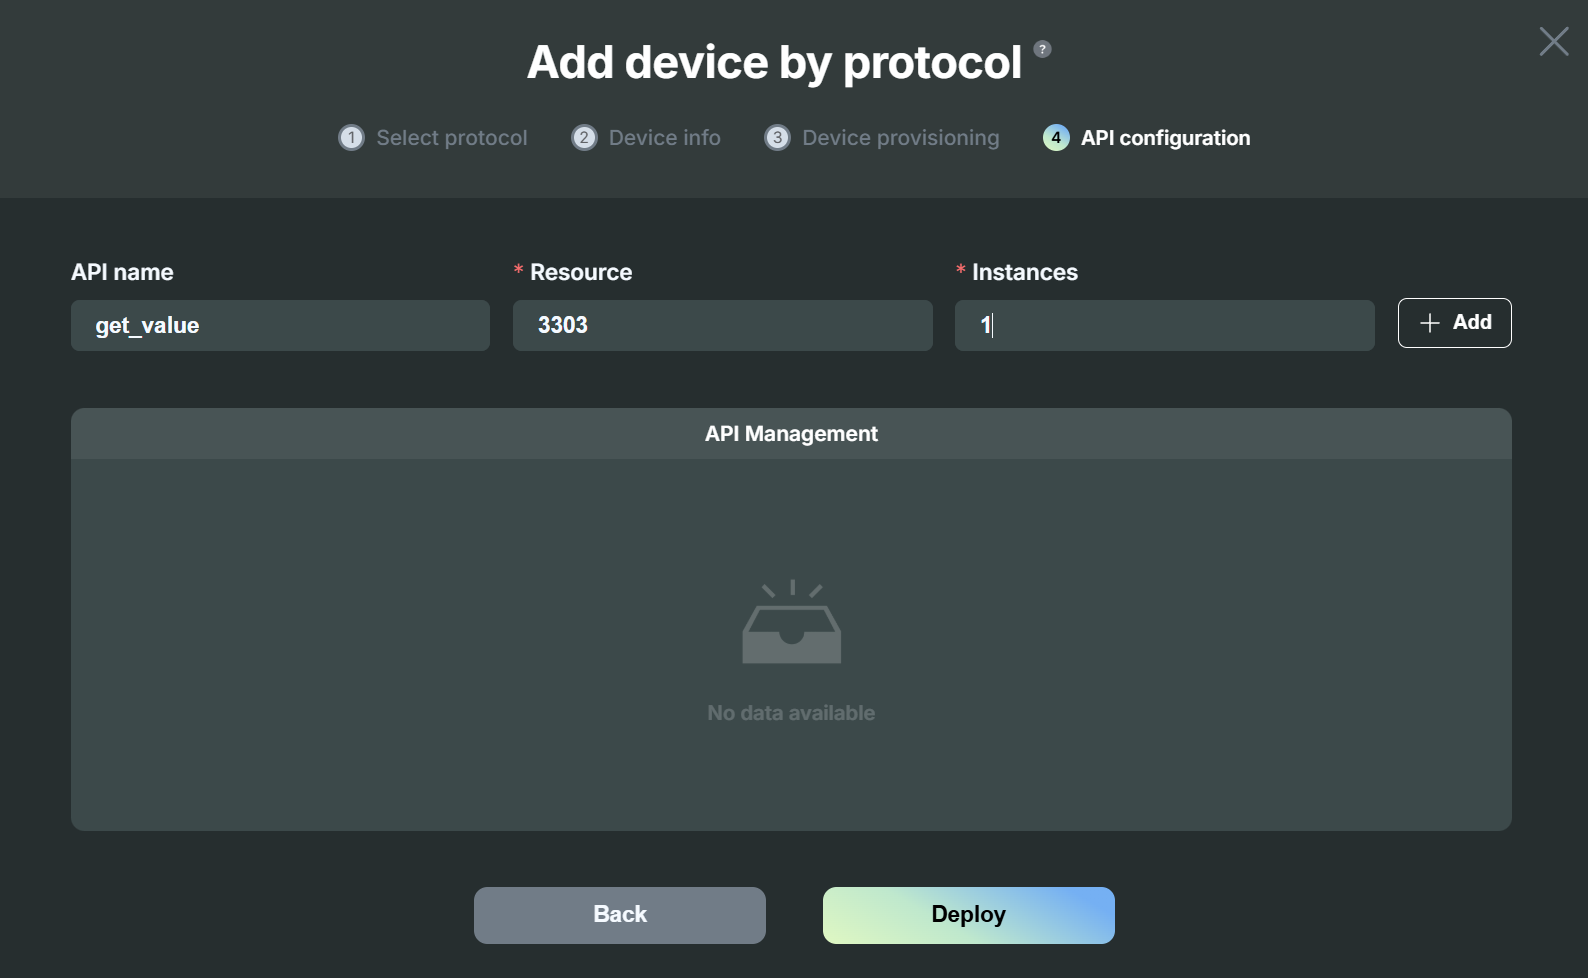
Enter resource ID, instances and API name. The API name is optional; if left blank, the API will default to the object ID. Click Add. Then click on Deploy.
(You can add multiple resource IDs.)
-
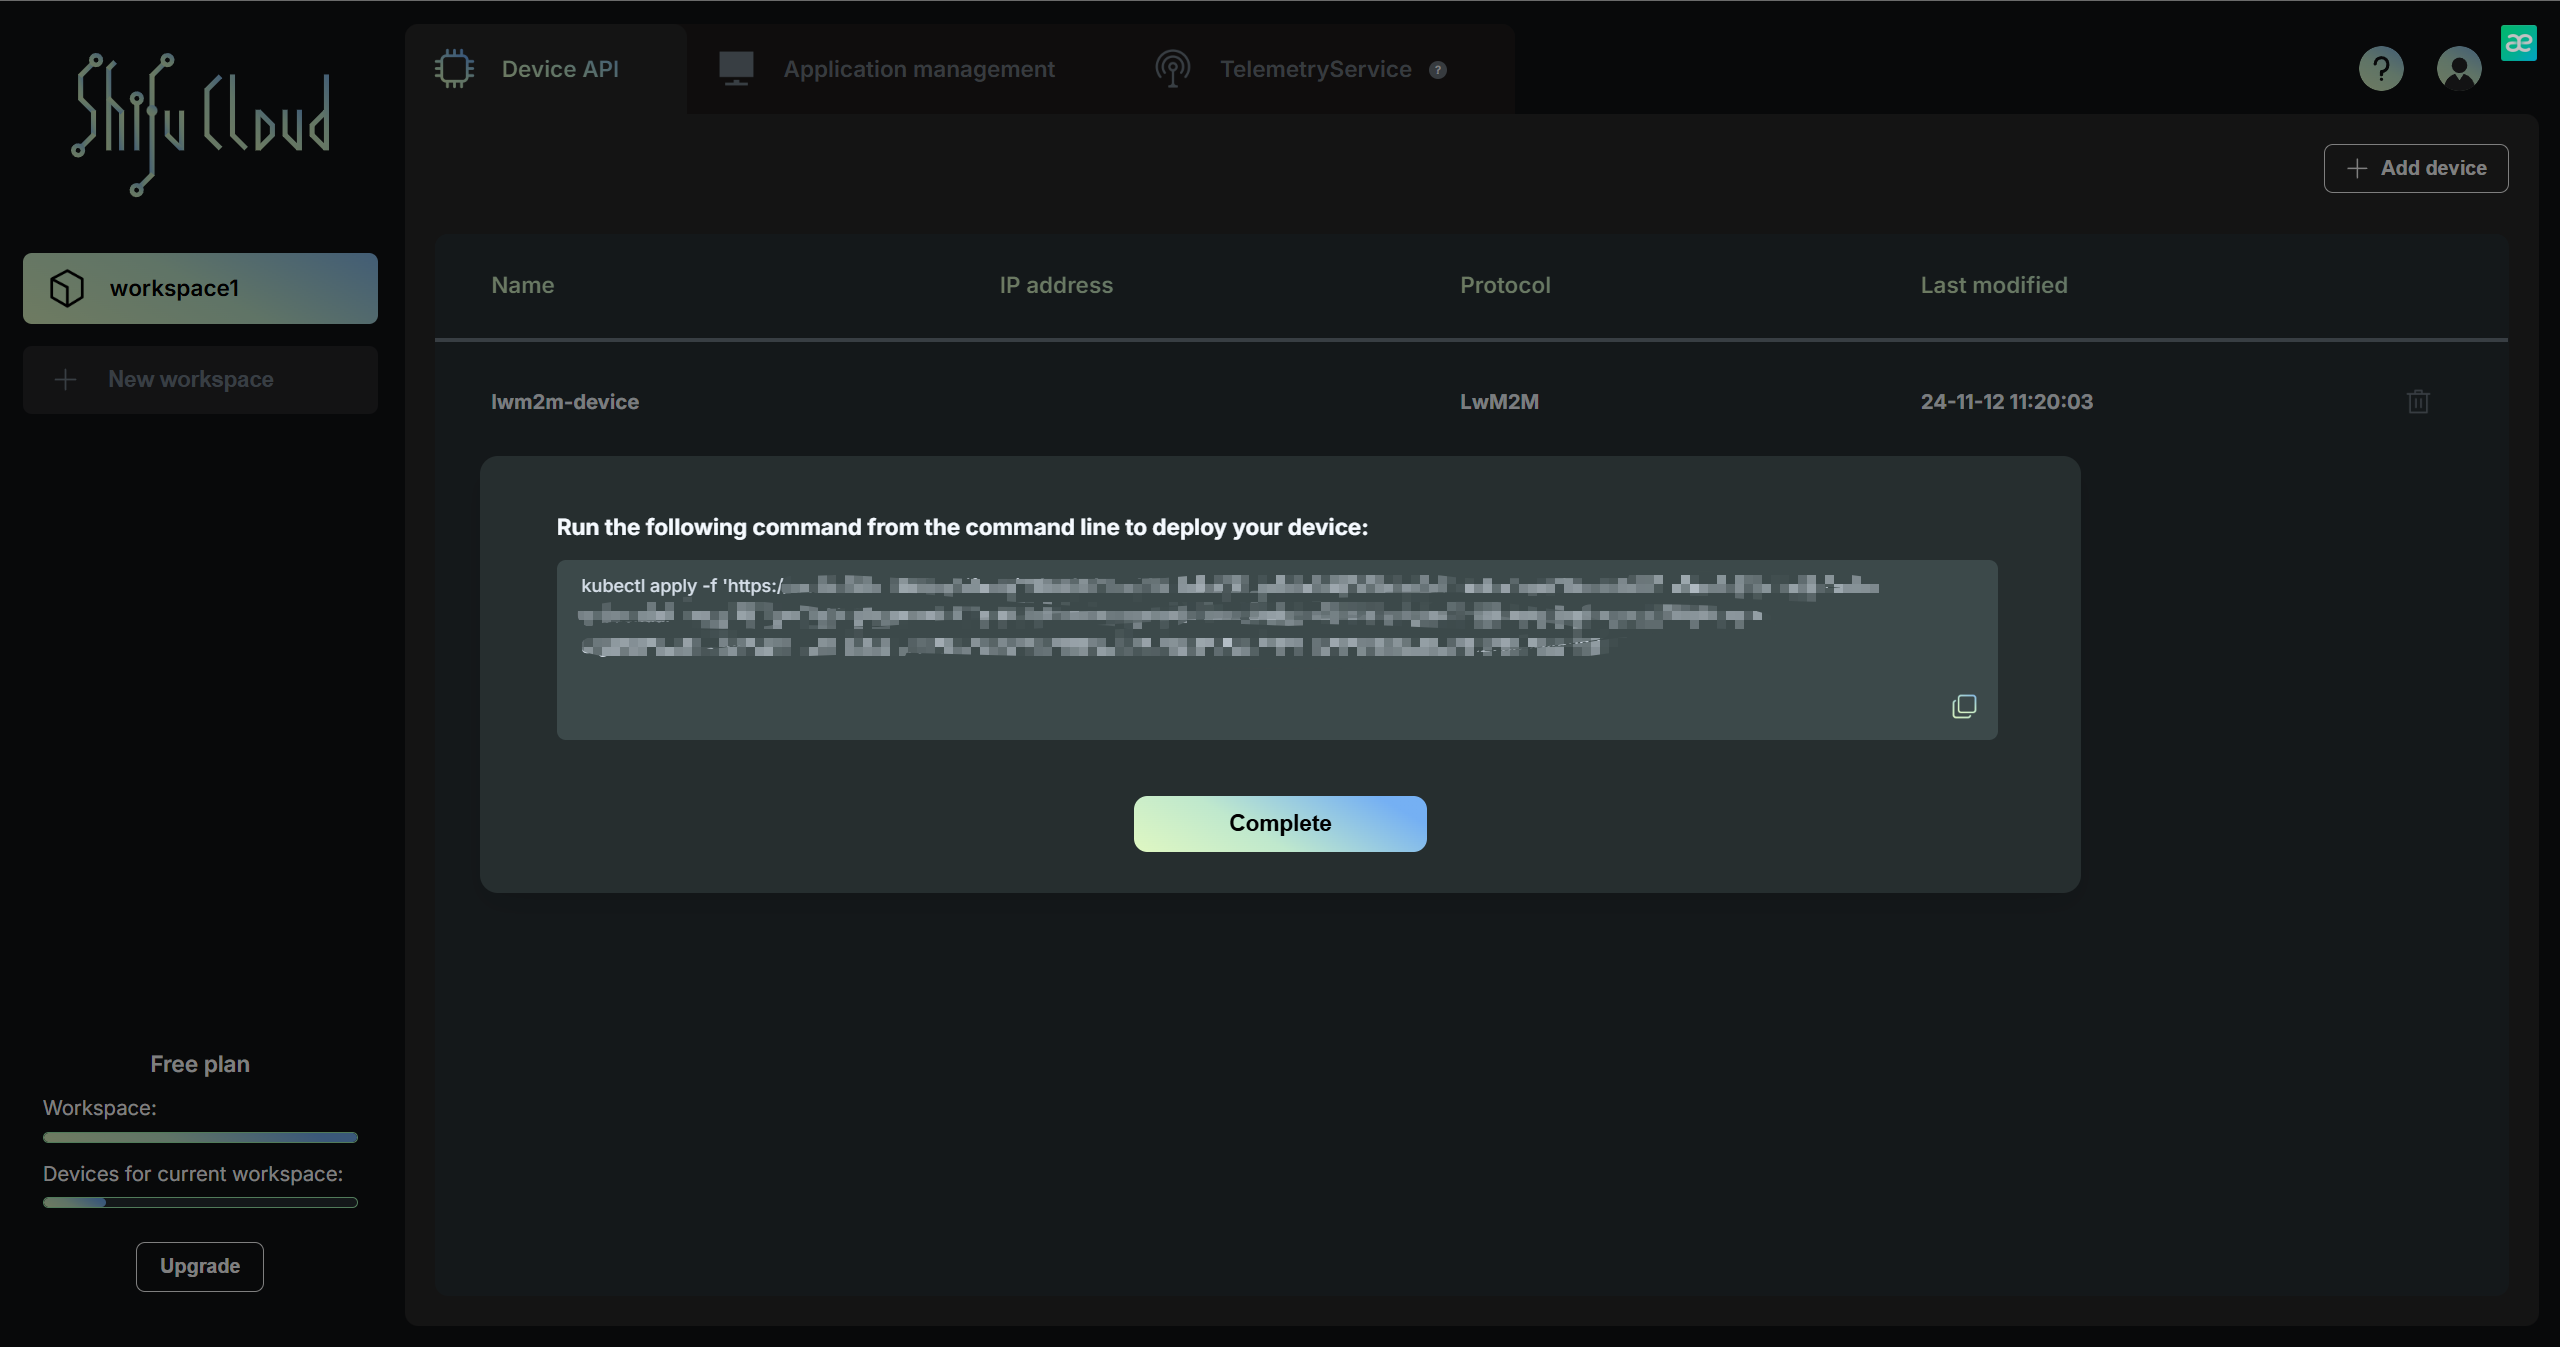
Copy and paste the command from the pop-up to deploy the device into your Kubernetes cluster.

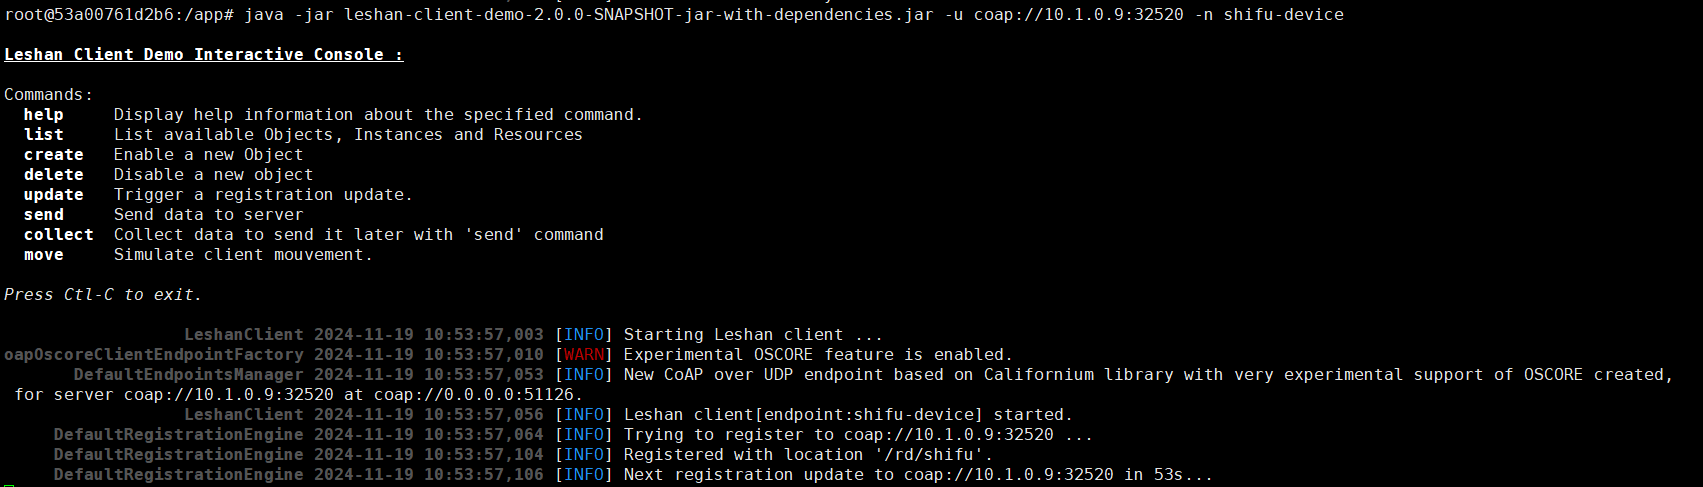
Usage(Take Leshan as an example)
-
Use following command to get your port.
kubectl get services -n deviceshifu
-
Run the Docker image first. Then use the following command to connect to deviceShifu.
-
Run the Docker image
docker run --rm -it edgenesis/lwm2m-demo-leshan-client:nightly bash -
Use the following command to connect to deviceShifu.
java -jar leshan-client-demo-2.0.0-SNAPSHOT-jar-with-dependencies.jar -u coaps://localhost:your port -n shifu
-
-
Create a new terminal and send the request to
/get_value/0/SensorValueto get the result.